 When the faucet aerator is blocked, you will realize that water is flowing at a reduced rate from your faucet. At this time, it will be right to unclog bathroom sink faucet. Sediments that flow alongside the water will cause the faucet aerator to be clogged. Other internal faucet parts will also get affected by the mineral deposits that are available in water. If your best bathroom faucet is clogged, you need to unblock it so that it can have a seamless flow of water. The process is quite easy.
The earlier fashion of bathroom faucets was designed to have valve seats and obsolete rubber. The design of the modern bathroom faucets entails the use of an internal cartridge valve system. These cartridges have small openings that trap sediments and water minerals thus slowing down the rate of water flow. If this is the reason making your faucet to allow the slow flow of water, you will need to replace the internal cartridge. Otherwise, you can just clean the faucet cartridge.
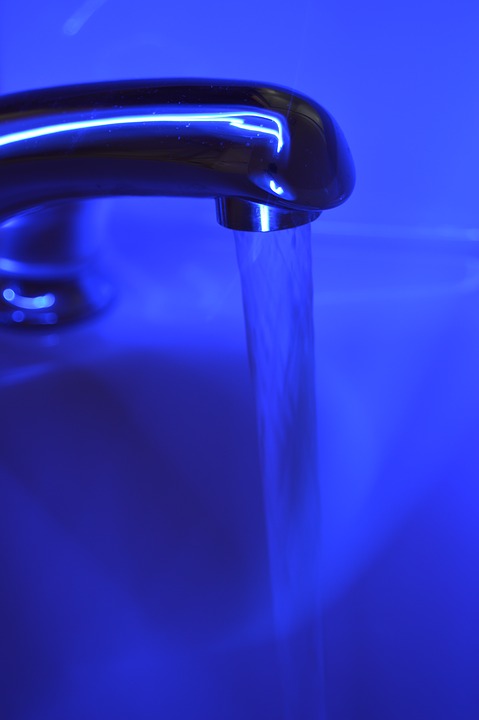
You will realize that when the faucet is clogged, water flows out at low pressure. You will have to wait for a bit longer before the bucket of water gets full. This is not what you want because sometimes, you are in a hurry. How do you resolve the issue of low pressure in your bathroom faucet? I will give you a simple procedure which will revolve around unclogging the bathroom sink faucet. Down here is what to do.
Contents
Checking The Possibility Of Sediment Blockage
If there is a drop in the rate at which water is flowing down the faucet, it is either that the entire system is faulty or one of your bathroom sinks is having an issue. Mostly, this issue is commonly a sediment blockage. How do you know that the problem is sediment blockage?
You need to test whether water is flowing at the standard rate from the other faucets in your house. If there is no any issue in the other faucets available in your house, then deal with the specific bathroom faucet which is allowing water to flow at a strained pressure. How will you go about this one? Start by inspecting the faucet aerator.
Ensure you have the following before getting started:
- A small basin
- A piece of rubber band
- Vinegar
- A small brush
- Faucet cartridge valve for replacement
- Screwdriver
- A pair of pliers
- Locking-grip pliers
Inspecting The Faucet Aerator
A faucet aerator is located at the spout and its function is to catch any debris moving alongside the flowing water. With time, this debris and sediments build up leading to a blockage around this area. How do you fix this problem? You need to unscrew the spout and clean the aerator to remove the blockage. The entire process will enable you to unclog bathroom sink faucet which is essential for the standard water flow rate.
After all the cleaning process, it is expected that water will start to flow at the normal pressure. Down here is the process of cleaning the faucet aerator.
Cleaning The Faucet Aerator
First, you need to understand that an aerator is a small screen at the end of the faucet’s spout. Around the outside of the faucet aerator, wrap a rubber band which will help to prevent scratches from the pair of pliers to the faucet aerator. Hold the protective rubber band firmly by the use of pliers. Loosen the faucet aerator by turning the pair of pliers.
Normally, a modern faucet aerator engrosses a polished metal ring, wire mesh screen, outer threaded and plastic flow restrictors. Sometimes, it is possible to find a faucet aerator whose wire mesh screen and plastic flow restrictors are just one thing. When you are disassembling the faucet aerator system, you don’t need to separate this section.
After you disassemble the faucet aerator system, remove any mineral deposits and sediments by use of your fingers. Put these components in a small basin and pour vinegar in them until they are fully covered. Allow around 30 minutes or even half a day for the mineral deposits to get dissolved. After the lapse of the 30 minutes, use a small brush to scrub the aerator components to help remove any mineral deposits that failed to dissolve. A discarded toothbrush can as well be used in the place of the small brush.
Once the cleaning of the faucet aerator has been completed, you need to reassemble the components. You have already undergone all the process to unclog bathroom sink faucet and now on the verge of finishing the job. Finally, hand-tighten all the connections so that each component is back at its usual position. You can now test whether there is an improvement in the rate at which the water is flowing.
If you unclog bathroom sink faucet and you still experience an issue related to low pressure, then the problem might be mightier. At this juncture, you need to work on the cartridge.
Inspect The Faucet Cartridge To Unclog Bathroom Sink Faucet
If you realize that the issue is in the faucet and not aerator, you will have to inspect the faucet cartridge. When inspecting the faucet cartridge, it is advisable to have a manual that was given to you when you bought the faucet. Otherwise, you can find the manual online and the work will be easy in this case. A faucet cartridge controls the water flowing from the faucet.
Each faucet handle is designated to have a cartridge. For example, a two lever faucet will have two cartridges and a single lever will have one cartridge. If the cartridge is faulty, you can decide to replace it. Here is how to replace a faucet cartridge.
How To Replace A Faucet Cartridge
The first thing is to turn off any water supply that comes to the faucet. Next, empty any water available around the faucet spout. I am sure you already have the manual or you have gotten the procedure online. These sink faucets are different and it will be sensible to have the specific manual. We now go ahead and disassemble the faucet cartridge.
Loosen the cover plate and the set screw by removing the faucet handle. Ensure that you have a two cartridge valve replacements if your faucet is double-handled. Expose the cartridge by loosening the screw that holds the faucet body. The cartridge is located under the faucet handle and it is held at this position by use of a screw.
After you do all this, you will see a plastic cylindrical gadget which you should just slide out after loosening the screw. Having the new faucet cartridge, slide it into its place and secure it by use of a new screw. After that, reassemble the faucet handle and repeat the same procedure in the other lever if it was a double-handle faucet.
You can now allow the water to flow and it should flow steadily at the right flow rate and standard pressure. As you can see, it is possible to unclog bathroom sink faucet effortlessly. If you realize that there is a need to unclog bathroom sink faucet, just collect the right tools and the work will be quite straightforward.
Conclusion
You need to unclog bathroom sink faucet if you realize that water is flowing at low pressure. In most cases, there is a blockage that is causing the water to flow at low pressure. If this is the case, you will easily get annoyed by how much amount of time that you will have to spend to fill a bucket of water. You are in a hurry and want to get a quick bath but it is not possible. You end up being late! In today’s post, you have learned how you can unclog bathroom sink faucet and improve the water flow rate. If you like this material, share it with your friends.