 How do you install a corner sink in your small kitchen space? Corner sinks can be a very unique concept in terms of an interior of any kitchen. It is a non-conventional way that you can choose to stand out about the whole look of your kitchen interior.
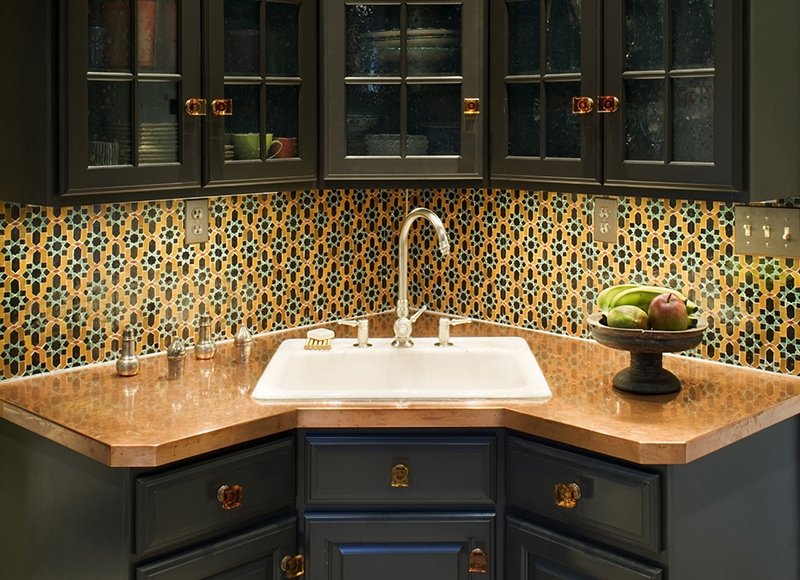
Corner sinks are actually sinks that are built on the side of a kitchen counter. These need special attention while installing.
Mainly corner sinks are installed by people who want to maximize their counter space fully. Being at the corner of the whole kitchen, the rest of the place can be easily used for other purposes.
Installing a corner sink can be a bit tricky as its installation process is different from that of other sinks. The installation process of a corner kitchen sink requires special attention as different kitchens have different sized countertops; also, different sizes of corners require different types of designs.
To effectively understand the germane corner sink for your kitchen, Sink Byte is recommended for information about such kitchen fixture; with their professional help, you will understand the corner sink that will be perfect for your situation.
In this discussion below, we will discuss the installation process of corner sinks. This will expectantly be beneficial to you whether you try to install it by yourself or through professional help.
The step by step process on how to install a corner sink is given below for your convenience.
- First of all, you need to decide on the spot where the cabinets will fit in. In most of the cases where corner kitchen sinks are to be installed, the cabinets are usually placed beneath it. These cabinets consist of the plumbing area of the whole kitchen sink space.
There has to be a perfect even are to fit the cabinet. If there are any kinds of unevenness in the cabinet area, these can be fixed through adding shims of different thicknesses. But before putting the shims in place, there has to be a proper measurement taken to properly install the cabinet area.
This way, after installing the cabinet, there will be a lesser chance of any error in the sink’s placement. An error means doing the same task all over again, so making sure the measurements are accurate when it’s installed in the first instance will ultimately be fruitful.
- After you are done with the cabinet it’s time to add the frames to it. Frames are the support in which the whole structure of the cabinet sits on.
After the perfect measurements are taken, wood planks have to be cut perfectly in measurements. Then these wood planks need to be attached in place with the help of necessary tools like nail hammer or screw. Rather than nail and hammer, crew and a drill machine will probably be more durable and effective.
- When all the wood planks are properly in place and the frame is ready, then the main boards that cover up the whole structure have to be fitted in place. One thing that has to be kept in mind when putting the boards of the cabinets in place is that you need to keep the top part of the boards free as the place is for the sink that has to be installed. Boards of a kitchen cabinet can come in different types of materials.
You need to choose a good quality material that is resistant to water as the cabinet will be just below the sink, thus, it ough to come in regular contact with water. Choosing a good quality cabinet material will minimize any water-related damage to the cabinet below.
- The next step is installing your main sink. Different materials can be used in case of corner sinks but the most common and easy to install material is the stainless steel. Nevertheless, there are also materials like fireclay or granite composite used in corner sinks.
The design of the corner sink depends on the corner in which the sink will be placed. Different kitchens have different sizes and shapes of corners. So, the design will be based on the corner’s outlook.
Corner sinks can be both under mount and drop in. You need to accurately follow the instructions given with it for error-less installation.
- After properly installing your sink, now comes the part where you need to arrange the water lines that need to be put in. corner sinks require special attention in terms of plumbing issues, as these are not as easy to handle as traditional sinks. Before putting the sink in, you need to decide on the number and type of faucets that will be inserted in your sink.
Then according to the measurements, you have to fix the water lines that will be fixed with the faucets. As corner sinks have a bit different approach than other sinks it’s preferable to give the plumbing task to professional hands or someone who has previous experience in installing corner sinks.
After all the pipes are put in place you should check for any possible leakage. And take the proper initiative if necessary.
Conclusion
In brief, corner sinks are a non-conventional type of sink that helps your kitchen interior to stand out in terms of design. To install a corner sink, the process should be straightforward. If you choose a corner sink for your kitchen, hopefully, this information will lead you to a properly installed corner sink and help you with some knowledge about it.